Tuesday, September 8, 2015

Felt board Monsters

Felt Board Monsters
Builds on: creativity, confidence and imagination  
I actually got this idea from And Next Comes L for a felt board activity and decided to make some of my own monsters. It was a total hit! Hoots, Roos and even older kids love seeing what kind of monsters they can create together.

What you'll need:
6 different colored sheets of felt
1 sheet of white felt
Black paint pen
Scissors
Felt board

What to do:

Cut out one large monster body shape with arms and legs from each of the colored felt sheets. It's best to have a different shape for each color to make it more interesting for the kids.

Using the white felt cut pairs of different sized shapes for the eyes. Color small solid circles to make the eyeballs as pictured. While those are drying use the left overs of the colored  and white felt sheets to cut out decorative pieces like hair, horns, clothes and teeth. What ever you can think of. 

Spread the pieces out on the felt board or in a bucket near by for the kids to create with. Encourage them to make the monsters any way that they want.  Enjoy some quiet time!

Monday, September 7, 2015


Pumpkin Bowling
Builds on: Hand eye coordination, gross motor and arts


What you'll need:
8-10 Empty food cans
Acrylic paint
Paintbrushes
Card board
Drop cloth
2 small pumpkins

What to do:
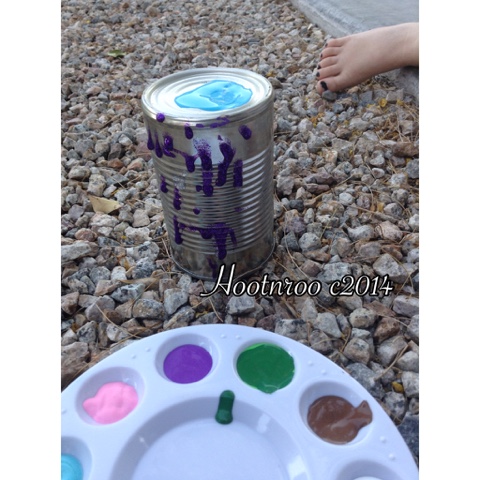
Acrylic paint does stain so you should put down a drop cloth first and change everyone into clothes that can get dirty. Place the cans, paint and paint brushes out with a large enough piece of card board for all of the paint you are using. Place a dollop of each colored paint onto the cardboard, hand your kids the paint brushes and let them at it. 

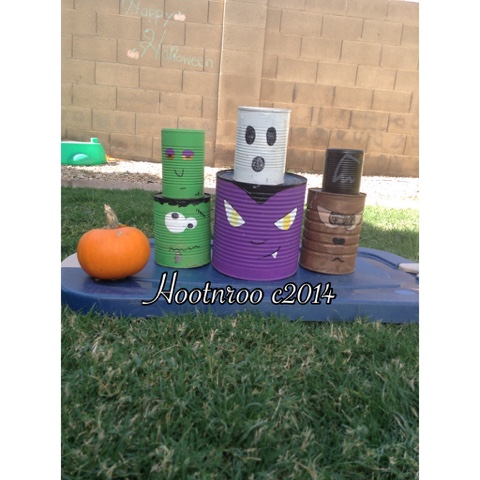
They can paint Halloween characters however they want on the cans but make sure they know that They will be hitting them with pumpkins later on. Roo was appalled when she found out her monster and fairy masterpieces would potentially be destroyed by an onslaught of pumpkins so we ended up using my monster cans instead. Once your cans are all dry, stack them in a pyramid formation or  wall to be knocked down . Place your kids about 6 feet from the cans with a pumpkin and let them roll the pumpkins to knock down the wall. Since smaller pumpkins have bumps and aren't round they'll wander as they roll creating a fun challenge for the kids to overcome. 


*Don't let the kids throw the pumpkins since they could really hurt someone.

Alphabet Monsters

Alphabet Monster
Builds on: fine motor skills, creativity, letter recognition

I love this activity because it's something that can be adapted to your child's growing literacy skills, as well as, helping to build confidence in their own decision making by giving them full creative control over their work. No eyes and crooked eyes are welcome!


What you need:
empty raisin canisters (cleaned)
colored paper
glue
googly eyes
scissors
markers

What to do:
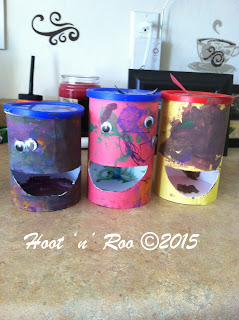
Place all of the materials out on the activity table. Explain that the canister is going to be the monsters head. He'll need eyes and a big mouth to eat lots of letters big and small. Ask the kids what color skin they'd like and pick out that color in paper. Have them help you by putting glue all over the canister so that you can wrap the colored paper around it. You'll need to help them by cutting off some excess paper at the bottom and draw a big open mouth on to the paper to cut out later. 

Have the kids glue their eyes on where they want them and paint or draw features like ears, freckles or hair. Set aside and let dry. Once it's all dried up you can use scissors to cut out the mouth you had penciled in before. 

*I used stencils to make bats, ghosts, spiders and cat shapes, writing a letter of the alphabet on each them for my monsters "food". If you follow my blog I can send you a sheet with these shapes that you can print out to save time.

Sit at the table with your monster and monster food. In a silly deep voice speak for your monster saying " I'm hungry! Feed me!" Have your kiddo pick out a letter and name it together before feeding your monster. Once they get a little better at letter recognitions the monster can ask for a specific letter to eat, challenging your kiddo to find the correct one. Work on letter sounds once they've mastered letters and site words once they start reading. 

Friday, September 4, 2015


Web in the night
Builds on: creativity and fine motor skills


This is an oldy but goody that I remember doing in school as a kid without the cool stickers. Great for Halloween and bug themes; kids really enjoy the spider web reveal in the end and then trying to make their own reveal designs.
What you'll need:
watercolors
a jar of water
paint brushes
white crayon
white paper
foam stickers
What to do:
Use the white crayon to draw a spider web on to the white paper. Because it's white on white it can be hard to see while you're drawing so hold the paper against a window while it's light out to make it easier to see the marks made by the crayon. 
Put everything out on the activity table and tell the kids that there is a something hidden on the paper that can only be seen when they paint the night sky. Let the kids pick their own colors  Once they reveal the first few lines see if they can guess what it is. If they haven't figured out what it is by the time the whole thing is uncovered start giving hints until they finally get it. Halloween paintings get stars, moons and ghost stickers while bug themes painting would get puffy bug stickers once the paint is dry.


This is a great activity to have planned for a babysitter on date night or for a quick family activity just before bed.
 

Give your kids creative license over their own work. If this is how they want night to be look, let it happen and build up their confidence by supporting their choice.

Extra resources:

If you're looking for more activities involving spider webs follow the links to some of these great ideas on our favorite blogs. 

Farm Shapes Sewing
Builds on : hand eye coordination, fine motor skills, life skills

This is the perfect activity when you need a little quiet time to talk on the phone or want to make dinner in peace after an active day. 

What you'll need:

Plastic canvas sheet
Printed farm shape outlines
Scissors
Marker
Basket
1.5 foot piece of yarn for each shape
Yarn needle


What to do:

 To make your own shapes you place your plastic canvas on top of your farm shape outlines and trace the shapes using your marker. Cut them out as best as you can with the scissors. Don't get too wrapped up in making it perfect because the sheets are grid based and you will drive yourself batty trying. If you aren't overly crafty you can purchase some from the Hoot 'n' Roo's Closet tab under "activity supplies" (coming soon).


Tie one end of the yarn to a corner of your cut out shape and string the other end through the eye of the yarn needle. Do this for each shape. If you only have Roos to worry about then place your finished product into a basket on the activities table for them to find on their own and figure out. Offer help if they ask.


Sheer The Sheep To Make Yarn
Builds on: dramatic play, fine motor skills

What you'll need:

a square piece of clear contact paper
scissors
painters tape
permanent marker
1 bag of cotton balls
a low window
1 plastic knife


What to do:
Use the permanent marker to draw the outline of a sheep on the front of the contact paper. Tear 4 pieces of painters tape measuring the length of each side of the contact paper from the roll. Remove the protective paper from the adhesive side of the contact paper and place your drawing against the window, sticky side facing you. Use the pieces of tape to secure the sides of your picture to the window. Now grab your bag of cotton balls and knife and invite the kids over.

As they stick cotton balls on to the sheep you can explain that during the fall farmers let the sheeps wool grow as thick as it will go. Hand over the knife and tell them that in the spring the farmer shaves off all the wool to make thread with. Let the kids shave off the "wool". Let the kids repeat this as often as they want. When you see that either the sheep isn't sticky anymore or that the interest is waning take a cotton ball and explain that to make thread with the wool farmers pulls the wool apart to make it more fluffy and then use a machine to spin/twist the wool into yarn.  Pull the cotton balls apart as you speak and encourage your kids to do the same. Once it's nice and fluffy pinch the "wool" between your fingers and show the kids how to twist it into small pieces of "yarn".

Related Resources:

Follow the links to a yarn activity and youtube videos about wool pulling and spinning.

Farm Shapes Sewing
Wool Pulling and Spinning Video

Spot The Cow Game
Builds on: counting skills, number recognition, finger strengthening

What you'll need:
Large side view print of a plain cow
1 large Ziploc freezer bag
1 tub of black playdoh
number cards 1-30


What to do:

Place the picture of the cow inside the Ziploc bag and zip it up. Place everything on to the activity table and sit across from your little. Explain that you're going to pick a number out of the number cards and your little is going to decide what number it is and make the same number of spots on the cow using small pinches of playdoh.

If you're new to counting and number recognition your going show a number 1-10 to your kiddo. Give them a minute to remember and help if they can't. Then count out loud together as playdoh spots are added to the cow.